This week was going to be a highly progressive one. Having chopped and changed so much over the past week or two, now I had everything where and how I wanted it, in relation to the boned mesh and the first cameras, it was time to get stuck in!

My animation process involved me duplicating the .max file I had of Manny in his starting position (arms out, iris's in place) each time I was to drastically alter the positioning of his arms and neck/head
The image above demonstrates how I managed to get Max's timeline to recognise the movements I was making with Manny's arms
Having set up the camera to be static at a particular frame (using Set-Key), I engaged Auto-Key and selected the requisite bone at the forearm (in this instance), and having right-clicked on the Rotate tool, I could manually specify how much along the Y axis I wanted to arm to twist - after confirming this numeric, two red-keyframes appeared on the timeline, of which the first I moved along the timeline to act quicker, in accordance with how quickly/slowly I wanted the movement to be
By setting up a/the camera/s in one viewport, I was able to keep track of how the animation would track in that camera field-of-vision
This is the result of the first three frames put together - further frames will include Manny's arms in all manner of sylistic poses and athletic stances, thats for certain!
Manny's (Advanced) Poses...

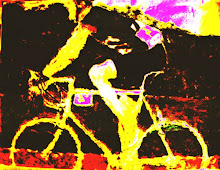
This is a static render from the third shot/scene in the animation. I was trying to recreate how you see the bodybuilders/wrestlers/posers psyche themselves up by rolling their head to either side and lifting up their shoulders (this also reduces fatigue in their muscles...yeah right!)

It was imperative that I still had the use of at least one other 'wireframed' window, along with the perspective window, while the other two were assigned as camera windows. This was so that while I could accurately adjust Manny's vairous limbs and torso, as well as giving me all the possible angles from which to work from.
Here I am recreating the movement in which the arms are rolled together, from around the shoulder ball-joint, and this is where the importance of including the bones along the breastbone came in; I could rotate them to improve the realism of the motion, but still conforming to how a mannequin would re-create this
Here I am recreating the movement in which the arms are rolled together, from around the shoulder ball-joint, and this is where the importance of including the bones along the breastbone came in; I could rotate them to improve the realism of the motion, but still conforming to how a mannequin would re-create this

This was also part of shot/scene four, where I had a little bit of trouble with the weighted bones pinching ever-so slightly up at the shoulder joint. This was inevitable, as the mesh itself would only try to conform to its original form as the skinning tried to oppose it, along a different axis - these were only small disconcerting niggles , much the same as the slight pulling on the left hand which, thankfully, only lasts a few frames of the animation!

Here, as part of the last two scenes of the 40 second clip, I was integrating facial movement along with the body. I intentionally kept facial movement to a minimum, as I felt it really only would succeed over the body movement in terms of expression should I have included some form of vocal lip-syching, but I still wanted to involve subtle lip gesticulation and eye-motion too
The timeline, as I eventually found out, was vey particular in the order/formation of which the facial movements would be implemented to Manny, in the event I was trying to combine both physical and facial movement alike
I may yet introduce the Morph tool, to achieve greater flexibility which facial movement and expression, although early tests have proven that this modifier doesn't allow as much minute subtlety as I could do with seperate motion from a designated camera, set aside from the flow of the body movement...
No comments:
Post a Comment